


If you run a custom apparel business, promotional product line, or a print shop that needs high-volume, precise printing, you've likely considered an oval printing machine-they're the workhorses of the screen printing industry, balancing speed, consistency, and flexibility better than many other setups. But here's the thing: even the most reliable oval machine won't perform at its best if you don't master its touch-screen interface. As a supplier of industrial printing equipment, I've worked with hundreds of print shop owners who skipped taking the time to learn their touch-screen features, leading to wasted prints, extended downtime, and even avoidable machine damage.
I'm writing this from years of on-site training and customer support experience, walking owners and operators through the small details that make a huge difference. Let's dive into how to use the touch-screen interface of an oval printing machine step by step, with tips that apply whether you're running a compact unit or a high-end model like the H9 Full Servo Oval Printing Machine.
Before You Start: The Pre-Use Check (5 Minutes That Save Hours Later)
Before you even tap the touch screen, there are a quick visual checks that set you up for success. I always tell new operators to start here:
- Confirm the machine is properly powered on (most touch screens will show a loading screen, not a black or frozen display).
- Make sure all print heads, pallets, and the conveyor belt are clear of debris, ink buildup, or leftover fabric from the last job.
- Verify the ink levels in each cartridge (low ink is one of the most common reasons operators panic through the touch screen).
Once that's done, navigate to the "Home Screen" on the touch interface. This is your command center-you'll spend 80% of your time here. Most home screens have four key tabs: Job Setup, Machine Controls, Maintenance, and Settings. I see new operators jump straight to Job Setup and skip the Settings tab first, which is a mistake.
Mastering the Core Touch-Screen Tabs
Let's break down each tab, starting with the most frequently used ones, with specific examples that apply to oval printing (since these machines have unique conveyor paths and pallet spacing that differ from flatbed or automatic screen printing machines).
1. Job Setup: Calibrate Pallets and Screens First
The Job Setup tab is where you input all details for your current run, and it's also where you calibrate the machine to your specific pallets and screens. For oval printing, pallet alignment is non-negotiable-if your pallets are off by even a millimeter, your print will be misaligned across the oval conveyor path.
When you open Job Setup, you'll see a few fields to fill out: number of colors, pallet size, print speed, and screen registration. The most important step here is the "Pallet Calibration" sub-menu. Here's how to do it correctly:
- Tap the "Calibrate Pallet" button, then select "One-Point" or "Three-Point" calibration. I recommend three-point for any job that uses more than two colors, because it accounts for the slight curve of the oval conveyor that can throw alignment off.
- Follow the on-screen prompts: the touch screen will guide you to place a test print blank on the pallet, tap the screen to mark the top, bottom, and side edges, and the machine will adjust the conveyor's positioning automatically.
A common mistake here is rushing calibration. I had a customer last year who skipped three-point calibration for a 6-color run, and ended up wasting 40 T-shirts because the registration was off. If you're switching between different pallet sizes (like switching from adult tees to hoodies), always re-calibrate-even if you just used the same pallets yesterday. You can also save calibration profiles for standard pallet sizes (small, medium, large) in the machine's settings to cut down on prep time for repeat jobs.
Another key feature in Job Setup is "Screen Registration Adjustment." On oval printing machines, each screen is positioned along the oval track, so the touch screen lets you adjust individual screen positions without manually moving the heads. If a print looks slightly off-center, tap the "Adjust Screen Position" button, then use the on-screen arrows to shift that screen left or right, up or down-no need to climb on the machine or loosen bolts. This is a huge time-saver for quick job changes.
2. Machine Controls: Speed, Timing, and Emergency Stops
Next up is the Machine Controls tab. This is where you start and stop the run, adjust print speed, and set dry time between prints. For oval printing, speed is a balance: go too fast, and ink will smudge; go too slow, and you'll lose efficiency.
The touch screen makes this easy: there's a real-time speed display that shows your current conveyor speed in "pallets per minute." For most standard T-shirt runs, 15-20 pallets per minute is ideal, but you can adjust this by sliding the speed bar on the screen. The screen will also show a "speed warning" if you go outside the machine's optimal range, which prevents over-stressing the servo motors-something that's easy to miss if you're watching the conveyor instead of the display.
One feature I love on modern oval machines is the "Job Timer" on the Machine Controls tab. You can set how long the machine pauses between print passes (for ink to flash) directly on the touch screen, instead of using a separate flash timer. For example, if you're using a flash unit between base and top ink, set a 30-second pause on the screen, and the machine will automatically hold the conveyor in place until that time is up. This eliminates human error from counting seconds manually.
And of course, the emergency stop button is always front and center on the Machine Controls tab-don't ignore it. If you hit stop, the touch screen will ask if you want to pause the job or abort it entirely. Always choose pause if you need to fix a small issue (like a stuck pallet), so you can resume exactly where you left off.
3. Maintenance Tab: Don't Skip the Touch-Screen Reminders
The Maintenance tab is often overlooked, but it's critical for keeping your machine running smoothly. The touch screen here will show you scheduled cleaning, part replacement, and calibration reminders based on your machine's usage. For example, if you run 1000 pallets, the machine will prompt you to clean the screen stencils and check the print heads on the Maintenance tab.
One tool here is the "Automatic Head Cleaning" function, which you can trigger directly from the touch screen. This is better than manual cleaning because it uses the machine's built-in system to clean each print head evenly, reducing the risk of ink clogs. I tell operators to run a short cleaning cycle at the start of every shift, using the quick 1-minute option on the screen-this small step prevents a lot of mid-job clogs that waste time and ink.

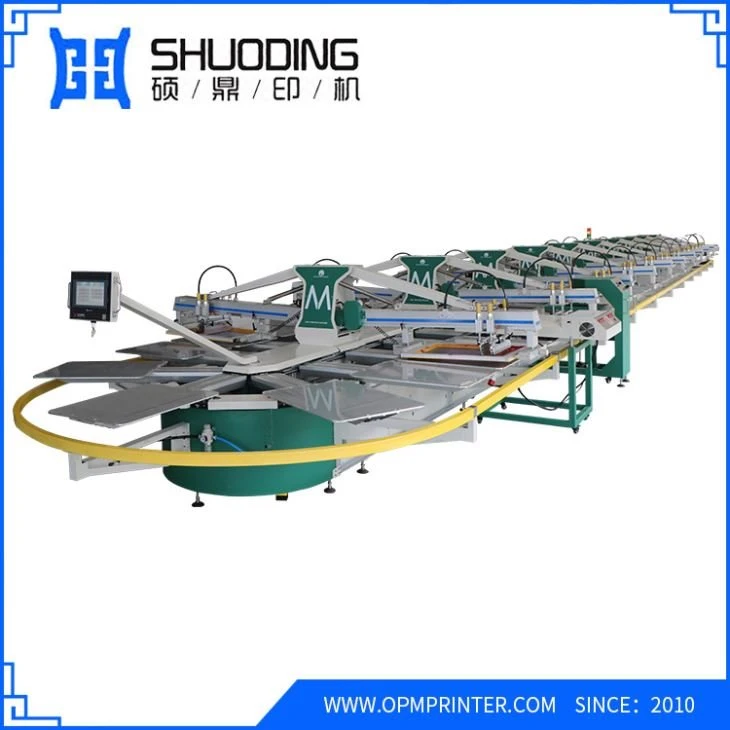
You'll also find troubleshooting guides here. If your machine is skipping pallets or not printing evenly, the touch screen will show a error code, and the Maintenance tab will tell you exactly what to check. For example, error code E07 usually means the pallet is not aligned, so you can go back to Job Setup and re-calibrate, instead of calling a technician right away.
4. Settings Tab: Customize the Interface for Your Business
The Settings tab is where you can adjust the touch screen's layout, set up user accounts, and save your favorite job profiles. If you run a print shop with multiple operators, this is a great feature-you can create different user profiles (Manager, Operator, Trainee) so only admins can adjust speed and settings, which prevents accidental changes to jobs.
You can also adjust the touch screen's brightness here, which is helpful if your shop has bright overhead lights that make the screen hard to see. I've had customers in dark shop floors crank down the brightness and add a lock screen so the machine doesn't get bumped or changed by accident.
Tips for Avoiding Touch-Screen Mistakes (From a Supplier's Perspective)
Over the years, I've seen dozens of operators make avoidable mistakes with the oval printing machine's touch screen. Here are the ones I remind every customer of:
- Don't use harsh cleaners on the touch screen. A paper towel with window cleaner is fine, but don't spray liquid directly onto the screen-get it in the gaps and cause damage. If you see a smudge, wipe it gently with a dry microfiber cloth.
- Save job profiles for repeat runs. If you do the same design every week (like a company logo for promotional shirts), input all the details (number of colors, pallet size, calibration) into a saved profile on the touch screen. This cuts prep time by 10-15 minutes per job, which adds up fast.
- Don't ignore touch screen error codes. Even if the machine seems to be working, if you see an error, stop and check it. Most errors are small (low ink, misaligned pallet) and easy to fix before they cause bigger problems.
- For comparison, if you need flatbed printing, automatic screen printing machines have a different touch interface, but the core logic of calibration and job setup is similar. The key for oval machines is accounting for the curved conveyor path, which is what makes the H9 Full Servo Oval Printing Machine so reliable for high-volume runs.
Ready to Upgrade Your Printing Setup?
Mastering your oval printing machine's touch-screen interface is the first step to consistent, efficient printing for your business. Whether you're just starting out and need a reliable entry-level unit or looking to upgrade to a high-capacity model, having the right machine with a user-friendly touch screen makes all the difference.
If you're in the market for a new oval printing machine, or want to learn more about how our equipment can fit your production needs, feel free to reach out. We offer on-site training to make sure you feel comfortable with every feature of your touch-screen interface, so you can spend less time troubleshooting and more time printing quality products.


